
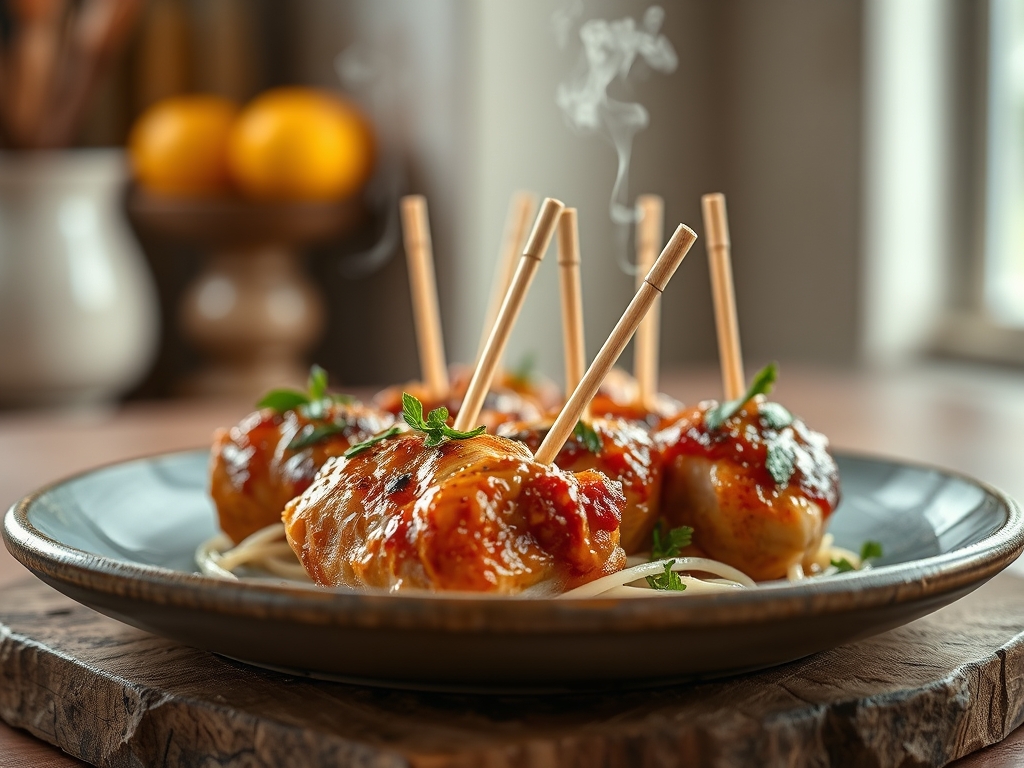
Imagine the sound of a glass-shattering crunch echoing through your kitchen as you bite into a perfectly lacquered wing. This is the ultimate sensory reward of mastering lollipop chicken recipes; a culinary transformation that turns humble drumettes into elegant, handheld protein grenades. We are moving beyond the standard bucket of wings. We are diving into a world where the skin is rendered to a paper-thin crisp and the meat remains succulent thanks to a strategic anatomical shift. By scraping the meat down to one end of the bone, you create a concentrated sphere of flavor that cooks more evenly and presents like a five-star appetizer. Whether you are prepping for a high-stakes game day or a sophisticated cocktail hour, the physics of the lollipop shape ensures that every millimeter of surface area is exposed to the heat. This results in a superior Maillard reaction that standard wings simply cannot match. Grab your sharpest shears; we are about to re-engineer the way you think about poultry.
The Gathers:
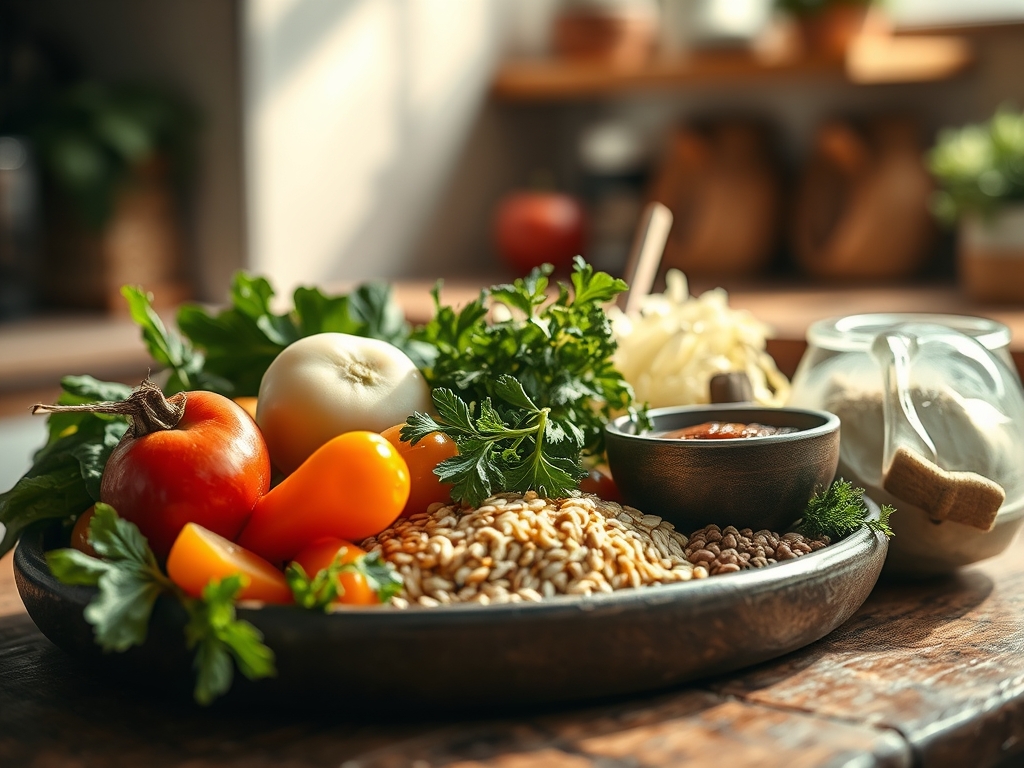
To execute this recipe with precision, your mise-en-place must be impeccable. You will need eight high-quality chicken drumettes. Look for air-chilled poultry if possible; this ensures the skin has a lower moisture content, which is the secret to achieving a viscous and glass-like exterior. For the dry dredge, you need 50 grams of potato starch. Unlike wheat flour, potato starch contains larger amylose molecules that create a more rigid, crystalline structure when fried.
For the glaze, gather 60ml of aged soy sauce, 30g of honey for its hygroscopic properties, and a 2-inch knob of ginger. Use a microplane to grate the ginger into a fine paste; this increases the surface area and allows the gingerol compounds to infuse the sauce rapidly. You will also need 5ml of toasted sesame oil and a pinch of xanthan gum if you want a professional, emulsified sheen that clings to the meat without dripping.
Smart Substitutions: If you are avoiding nightshades, swap the chili flakes for a piquant squeeze of fresh lemon juice and cracked black pepper. If potato starch is unavailable, cornstarch is an acceptable alternative, though the crunch will be slightly more delicate. For a soy-free version, coconut aminos provide a similar umami profile with a lower glycemic index.
The Clock:
The total investment for this dish is approximately 45 minutes. The "Chef's Flow" is divided into three distinct phases: the anatomical prep (15 minutes), the thermal rendering (20 minutes), and the glazing finish (10 minutes). Efficiency is key here. While your chicken air-dries after the "lollipop" surgery, use that window to whisk your sauce in a saucier. This overlap ensures that the chicken is ready to be coated the moment it hits its peak internal temperature, preventing the dreaded soggy crust that occurs when fried foods sit for too long.
The Masterclass:
1. The Anatomical Score
Use a sharp pair of kitchen shears to cut through the skin and tendons at the narrow end of the drumette. Push the meat down toward the thicker end using a bench scraper or your thumb, exposing the clean bone.
Pro Tip: This process is called "frenching." By removing the connective tissue, you prevent the meat from shrinking unevenly. The science here involves collagen denaturation; by concentrating the mass, the interior stays hydrated while the exterior dehydrates into a crisp shell.
2. The Starch Aeration
Toss the prepared lollipops in your potato starch and salt mixture. Ensure every crevice of the meat sphere is coated, then vigorously shake off the excess.
Pro Tip: Use a fine-mesh sieve to aerate the starch before coating. This prevents clumping and ensures a microscopic layer of starch that reacts instantly with the hot oil, creating tiny air pockets for maximum crunch.
3. The Precision Fry
Heat your oil in a heavy-bottomed skillet to 350 degrees Fahrenheit. Use tongs to gently submerge the chicken spheres, leaving the clean bones pointing upward. Fry for 8 to 10 minutes until the internal temperature reaches 165 degrees.
Pro Tip: This is where thermal carryover comes into play. Remove the chicken when the digital scale or meat thermometer reads 162 degrees. The residual heat will continue to cook the center to a perfect 165 while preventing the outer fibers from becoming stringy.
4. The Glaze Emulsification
In your saucier, simmer the soy, honey, and ginger until reduced by half. Toss the hot chicken in the glaze until every inch is coated in a shimmering, dark mahogany finish.
Pro Tip: The glossiness is a result of sugar caramelization and the reduction of water content. As the sauce cools slightly, the sugars form a non-crystalline matrix that "sets" on the chicken, providing that signature sticky-yet-crisp texture.
The Deep Dive:
Macro Nutrition: Each lollipop contains roughly 110 calories, 7g of protein, and 5g of healthy fats. The use of potato starch adds a small amount of complex carbohydrates, but the primary fuel source here is high-quality avian protein.
Dietary Swaps: To make this Keto-friendly, replace the starch with crushed pork rinds and the honey with an allulose-based syrup. For a Vegan version, apply the same "lollipop" technique to king oyster mushroom stalks; the fibrous texture mimics chicken remarkably well when fried.
The Fix-It:
- Soggy Skin: Your oil temperature likely dropped. Always fry in small batches to maintain a consistent 350-degree environment.
- Burned Glaze: The honey reached its smoke point. Keep the sauce on low heat and only toss the chicken at the very end.
- Bloody Bone: This happens if the chicken was too cold. Let your meat sit at room temperature for 15 minutes before cooking to ensure even heat penetration.
Meal Prep: To achieve "day-one" quality when reheating, avoid the microwave at all costs. Use an air fryer at 375 degrees for 4 minutes. This re-activates the fats in the skin, allowing them to render once more and restore the original crunch.
The Wrap-Up:
Mastering lollipop chicken recipes is a gateway to becoming the most popular host in your social circle. It is a dish that balances the rugged satisfaction of fried chicken with the technical elegance of fine dining. By understanding the chemistry of starch and the physics of the frenching technique, you have elevated a simple wing into a culinary masterpiece. Now, plate these beauties on a slate board, garnish with a whisper of scallions, and watch them disappear in seconds. You have the tools, the science, and the flair; now go own that kitchen.
The Kitchen Table:
How do I keep the chicken bone from turning black?
Wrap the exposed bone in a small piece of aluminum foil before frying. This protects the bone from direct contact with the hot oil and prevents the marrow from oxidizing, ensuring a clean, white presentation for your lollipop chicken recipes.
Can I bake these instead of frying them?
Yes. Place the lollipops on a wire rack over a baking sheet at 425 degrees. The rack allows hot air to circulate around the entire sphere, ensuring the skin renders effectively without the need for a deep fryer.
What is the best way to clean the bone?
After cutting the tendons, use a dry paper towel to grip the bone and pull the meat down. The friction from the towel helps strip away any remaining periosteum or fat, leaving a perfectly smooth "handle" for your guests.
Why use potato starch instead of all-purpose flour?
Potato starch has a higher amylose content and a lower protein count than wheat flour. This results in a crispier, crunchier coating that stays firm even after being tossed in a viscous, liquid glaze or sauce.