
Imagine the scent of toasted coriander and peppercorns swirling through your kitchen as a dense, salt-cured brisket transforms into velvet in record time. When we talk about corned beef recipes pressure cooker methods are the absolute gold standard for achieving that elusive, fork-tender shred without waiting eight hours. We are bypassing the traditional slow-simmer to harness the power of atmospheric pressure; it is where high-level physics meets comfort food.
The challenge with brisket is its massive network of connective tissue. In a standard pot, you are fighting a battle of attrition against collagen. In a pressure cooker, you are using a high-heat, high-moisture environment to force hydration into those tough fibers. This results in a succulent, piquant masterpiece that tastes like it spent the entire day bathing in pickling spice. Grab your favorite heavy-bottomed skillet for a quick sear and let us dive into the mechanics of the perfect brine-to-plate transition.
The Gathers:
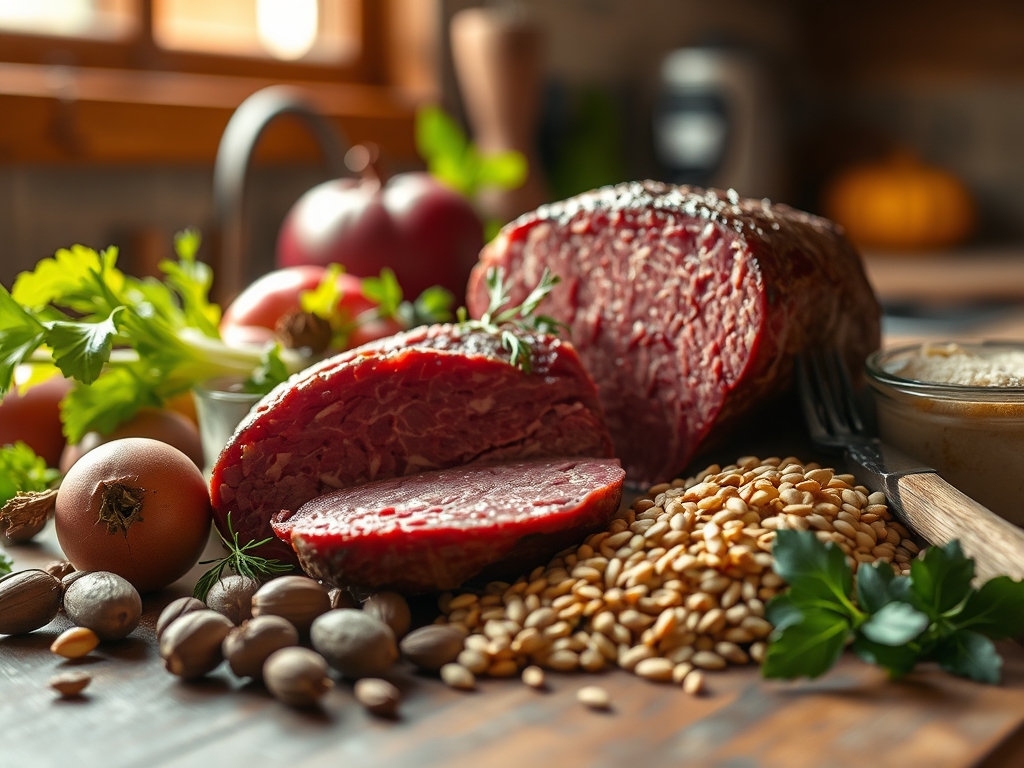
To execute this masterclass, your mise-en-place must be precise. Start with a three to four pound corned beef brisket; look for a flat cut if you want uniform slices or a point cut if you prefer a higher fat-to-meat ratio. You will need a quart of high-quality beef bone broth to provide a viscous base for the sauce. Gather your aromatics: four cloves of smashed garlic, one large yellow onion quartered, and the essential spice packet. If your brisket did not come with one, create your own blend of mustard seeds, bay leaves, and allspice berries using a digital scale for accuracy.
For the vegetable component, choose waxy red potatoes and thick-cut carrots. Waxy potatoes contain less starch than russets, meaning they hold their structural integrity under pressure rather than turning into a grainy mash.
Smart Substitutions: If you are watching your sodium, discard the liquid from the original packaging and rinse the meat thoroughly under cold water. You can substitute the bone broth with a dry Irish stout to add a deep, malty complexity. For a brighter flavor profile, use a microplane to zest a bit of orange peel into the liquid; the citrus oils cut through the heavy fats beautifully.
The Clock: 15 Minutes Prep | 90 Minutes Cook
Efficiency in the kitchen is about "Chef's Flow." This means performing tasks in an order that eliminates downtime. While your pressure cooker is preheating on the sauté setting, you should be prepping your vegetables. The actual active time is minimal. The meat requires approximately 70 to 80 minutes of high pressure, followed by a 15-minute natural release. This release period is non-negotiable; it allows the muscle fibers to relax and reabsorb the juices. Total "door-to-table" time is roughly two hours, which is a 75 percent reduction compared to Dutch oven methods.
The Masterclass:
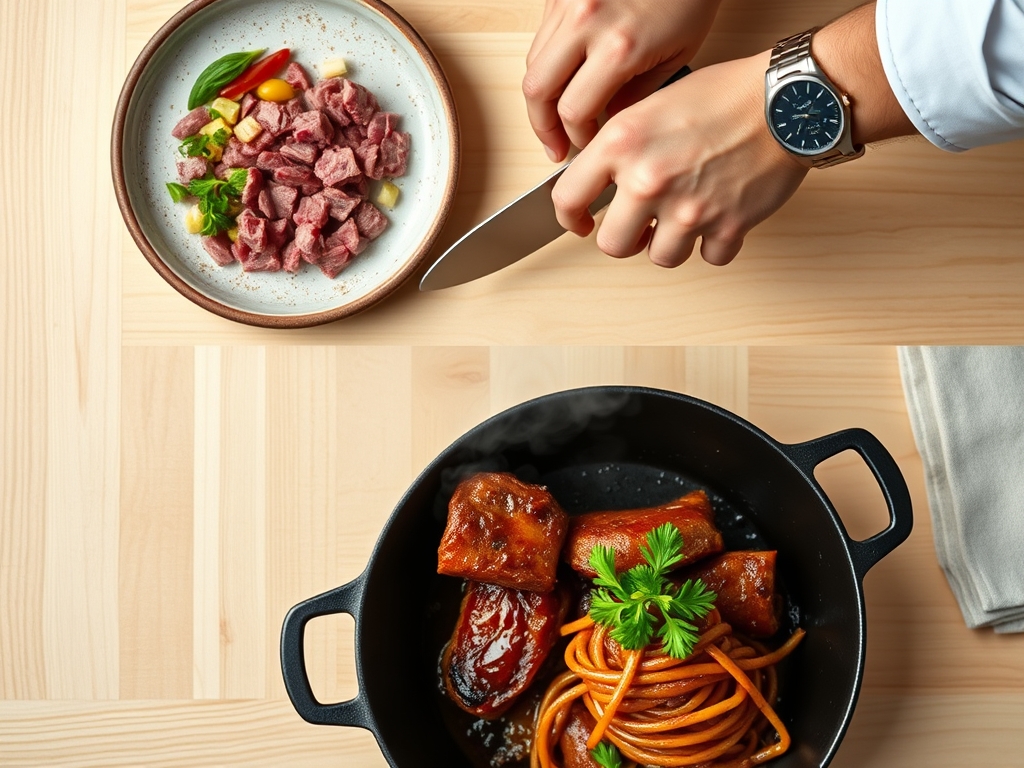
1. The Sear and Deglaze
Before locking the lid, use a heavy-bottomed skillet or the sauté function of your cooker to sear the fat cap. Once browned, remove the meat and add a splash of water or broth to deglaze the bottom. Use a sturdy wooden spoon to scrape up the brown bits.
Pro Tip: This is the Maillard Reaction in action. While corned beef is usually boiled, a quick sear creates complex flavor compounds that boiling alone cannot achieve. Deglazing ensures those flavors are infused back into the braising liquid.
2. The Liquid Ratio
Place the brisket on a trivet inside the pot. Pour in your broth and aromatics until the liquid reaches about halfway up the side of the meat. Do not submerge it completely, or you risk leaching out too much of the cured flavor.
Pro Tip: Using a trivet prevents the meat from scorching on the bottom. It also allows for convection-style heat distribution, ensuring the brisket cooks evenly from all angles rather than just stewing in its own rendered fat.
3. High Pressure Transformation
Lock the lid and set the timer for 75 minutes. Ensure the steam valve is set to the sealing position. This is where the magic happens as the high pressure raises the boiling point of the water, forcing heat into the center of the dense brisket.
Pro Tip: This stage focuses on collagen hydrolysis. At high temperatures, the tough triple-helix structure of collagen breaks down into gelatin. This is what gives the meat its silky, "melt-in-your-mouth" texture.
4. The Natural Release
Once the timer beeps, walk away. Let the pressure drop naturally for at least 15 minutes before toggling the manual release valve. Use long tongs to carefully move the meat to a carving board.
Pro Tip: This prevents thermal shock. A sudden drop in pressure causes the moisture inside the meat to boil and escape rapidly, which can leave the brisket dry and stringy despite being cooked in liquid.
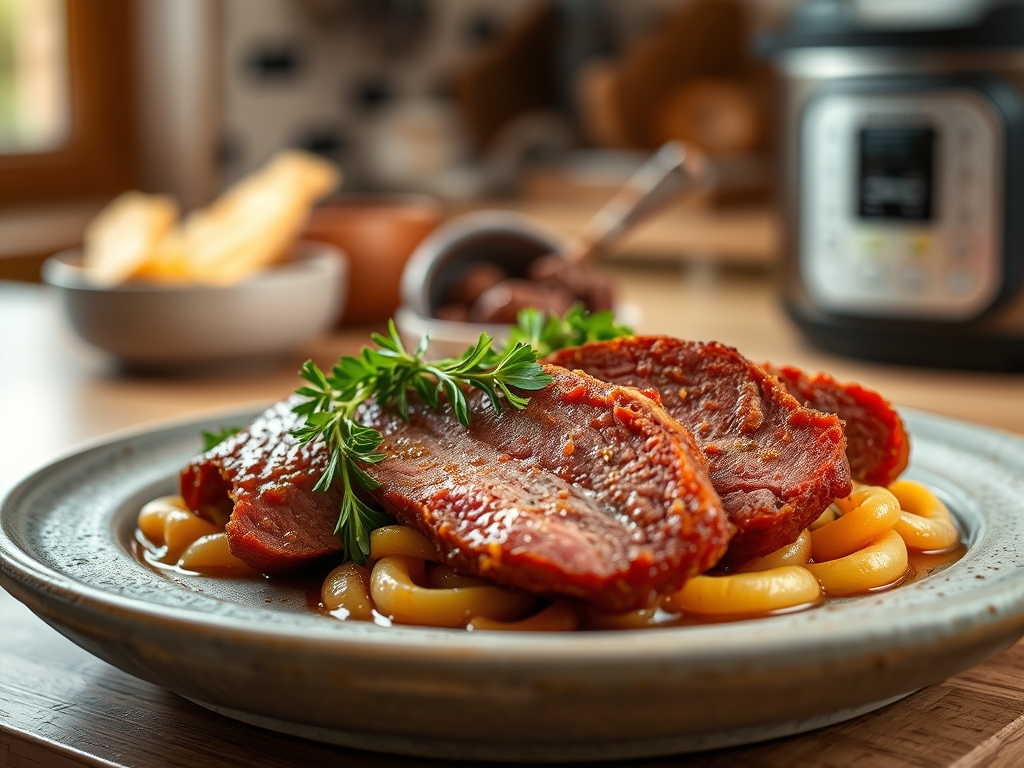
5. The Vegetable Finish
While the meat rests under foil, toss your potatoes, carrots, and cabbage wedges into the remaining hot liquid. Cook on high pressure for a mere 3 to 5 minutes.
Pro Tip: Cooking vegetables separately prevents them from becoming an overcooked slurry. The residual heat in the pot provides carryover cooking, finishing the vegetables to a perfect al dente while the meat fibers relax.
The Deep Dive:
From a nutritional standpoint, corned beef is a powerhouse of protein and B vitamins, though it is high in sodium. To balance the plate, focus on the fiber-rich cabbage and carrots.
Dietary Swaps:
- Keto: Skip the potatoes and double the cabbage. Use a sugar-free broth.
- Vegan: While the meat is the star, you can mimic the pickling spices using "corned" cauliflower steaks or seitan, though pressure times will drop to 5 minutes.
- Gluten-Free: Ensure your spice blend and broth are certified GF, as some pre-packaged spices use flour as an anti-caking agent.
The Fix-It:
- Tough Meat: If it is still rubbery, you likely undercooked it. Return it to the pot for another 10 minutes of high pressure.
- Too Salty: If the broth is overwhelming, add a peeled, raw potato to the liquid for the last few minutes; it acts as a sponge for excess salt.
- Greasy Sauce: Use a saucier or a fat separator to remove the oil from the cooking liquid before serving.
Meal Prep: To reheat, do not use the microwave. Instead, steam the slices over a bit of leftover broth. This uses latent heat to warm the meat without tightening the proteins, maintaining that day-one quality.
The Wrap-Up:
Mastering corned beef recipes pressure cooker style is a total game changer for your Sunday dinner rotation. By understanding the relationship between pressure, temperature, and collagen breakdown, you are no longer just following a recipe; you are conducting a culinary experiment with delicious results. Use your bench scraper to tidy up your station, slice against the grain for maximum tenderness, and enjoy the praise that comes with serving a professional-grade feast!
The Kitchen Table:
Why is my corned beef still tough after pressure cooking?
It likely needs more time to break down the collagen. Return the brisket to the pressure cooker for an additional 10 to 15 minutes. Always ensure you allow for a natural pressure release to keep the fibers hydrated.
Can I cook the cabbage and meat at the same time?
It is not recommended. The meat takes over an hour, while cabbage turns to mush in five minutes. For the best texture, cook the meat first, remove it to rest, and then flash-cook the vegetables in the remaining liquid.
Do I need to submerge the meat in liquid?
No, you only need enough liquid to reach halfway up the brisket. The steam created by the pressure cooker does the heavy lifting. Total submersion can actually dilute the flavor and result in a "washed out" taste.
Should I slice the brisket with or against the grain?
Always slice against the grain. Look for the direction of the muscle fibers and cut perpendicular to them. This shortens the fibers, making each bite significantly more tender and easier to chew.