
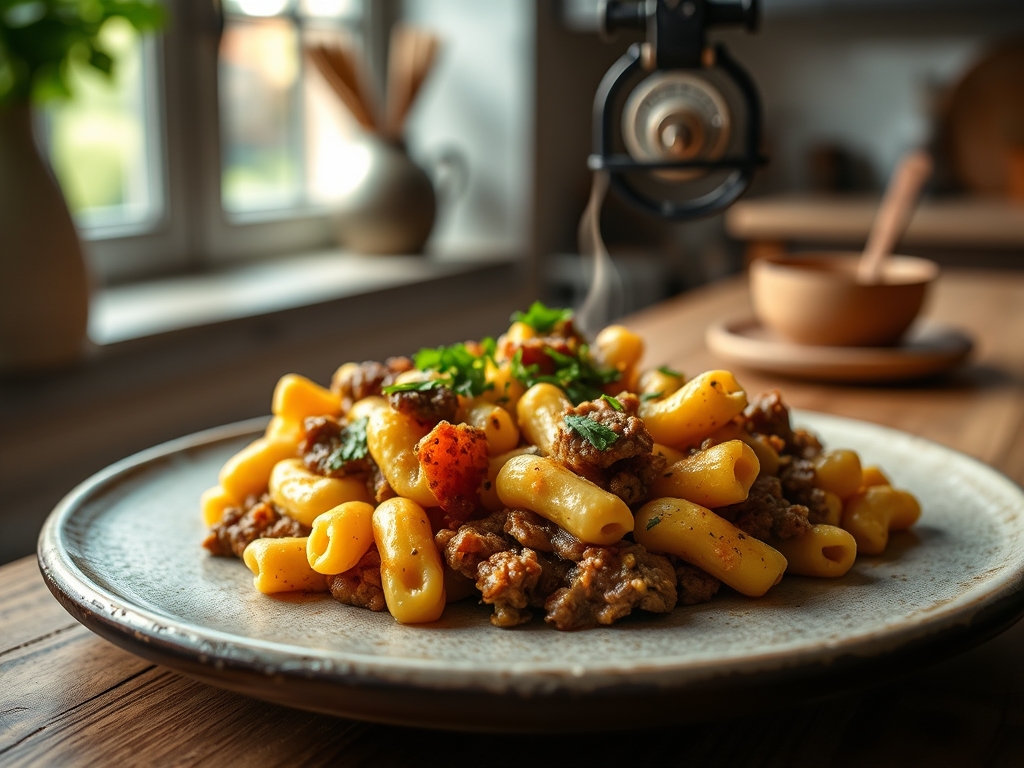
Picture the scene: a Tuesday evening where the air is thick with the scent of savory browning meat and the unmistakable, nostalgic aroma of neon-orange cheddar. We have all been there, staring at that iconic blue box while a chorus of hungry voices demands something substantial. Elevating this pantry staple into a gourmet family feast is not just about convenience; it is about mastering the chemistry of comfort. When you search for kraft mac and cheese ground beef recipes, you are looking for that perfect intersection of protein-packed satiety and velvety, cheese-laden bliss. It is the ultimate culinary hug that bridges the gap between a quick fix and a home-cooked masterpiece.
The magic happens when the salty, processed tang of the cheese powder meets the rich, umami-heavy profile of well-seared beef. This combination creates a complex flavor profile that satisfies the palate while providing the energy density growing kids require. We are not just making dinner; we are engineering a meal that balances textures, from the snap of the macaroni to the tender crumble of the beef. Let us dive into how we can transform these humble ingredients into a weeknight legend that looks as good as it tastes.
The Gathers:
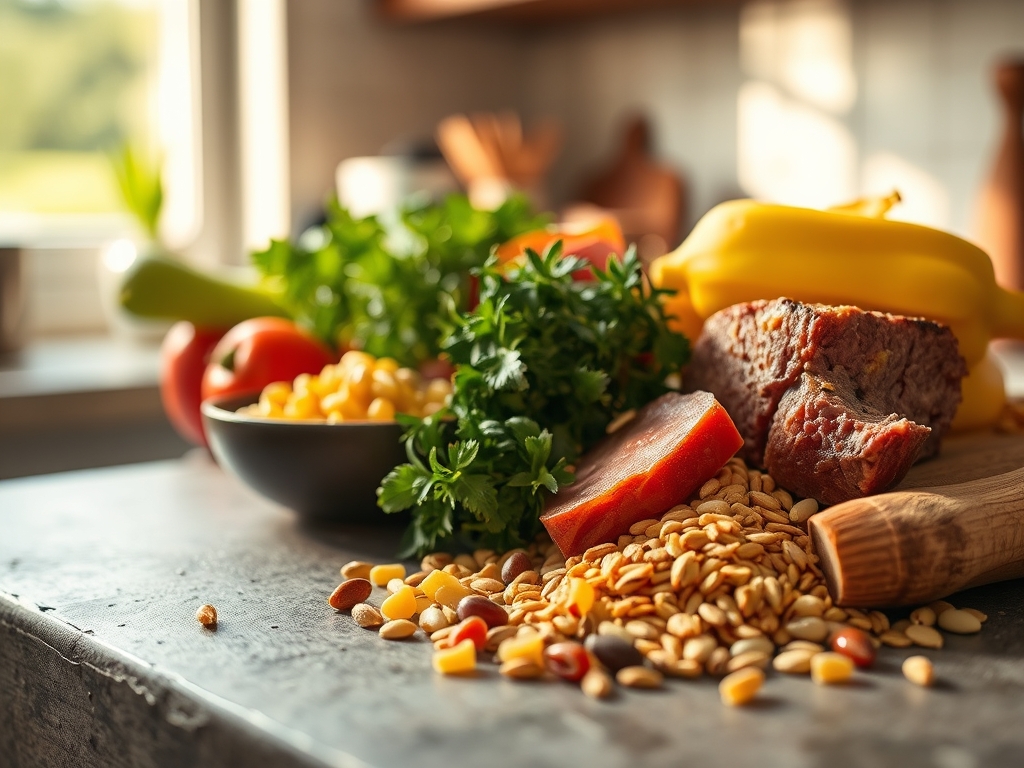
Before we ignite the burner, we must assemble our mise-en-place with precision. You will need two boxes of the classic blue label, one pound of lean ground beef (85/15 is the sweet spot for flavor without excessive grease), and your dairy components. Use a digital scale to measure your milk and butter for consistency; precision is the enemy of a grainy sauce.
For the flavor enhancers, gather high-quality sea salt, freshly cracked black pepper, and perhaps a pinch of smoked paprika to add a piquant depth. If you want to elevate the nutritional profile, have a bag of frozen peas or finely minced broccoli florets ready to toss in. Smart Substitutions are your best friend here. If you are out of whole milk, a splash of heavy cream or even a dollop of Greek yogurt can infuse the sauce with a sophisticated tang and a more viscous mouthfeel. If the kids are picky about textures, use a microplane to grate a small amount of onion directly into the beef; it disappears into the meat while adding essential aromatic compounds.
The Clock:
Efficiency in the kitchen is all about the Chef's Flow. This entire process takes exactly 22 minutes if you synchronize your movements. Your prep time is a mere 5 minutes, primarily focused on opening boxes and measuring liquids. The cook time spans 17 minutes, which is the exact duration needed to boil the water, cook the pasta to a perfect al dente, and render the fat from the beef simultaneously.
The secret to the flow is starting your water first. While the high heat works on the H2O, you tackle the protein. By the time the macaroni is ready to drain, your beef should be perfectly browned and seasoned. This overlap ensures that no component sits long enough to lose its structural integrity or heat.
The Masterclass:
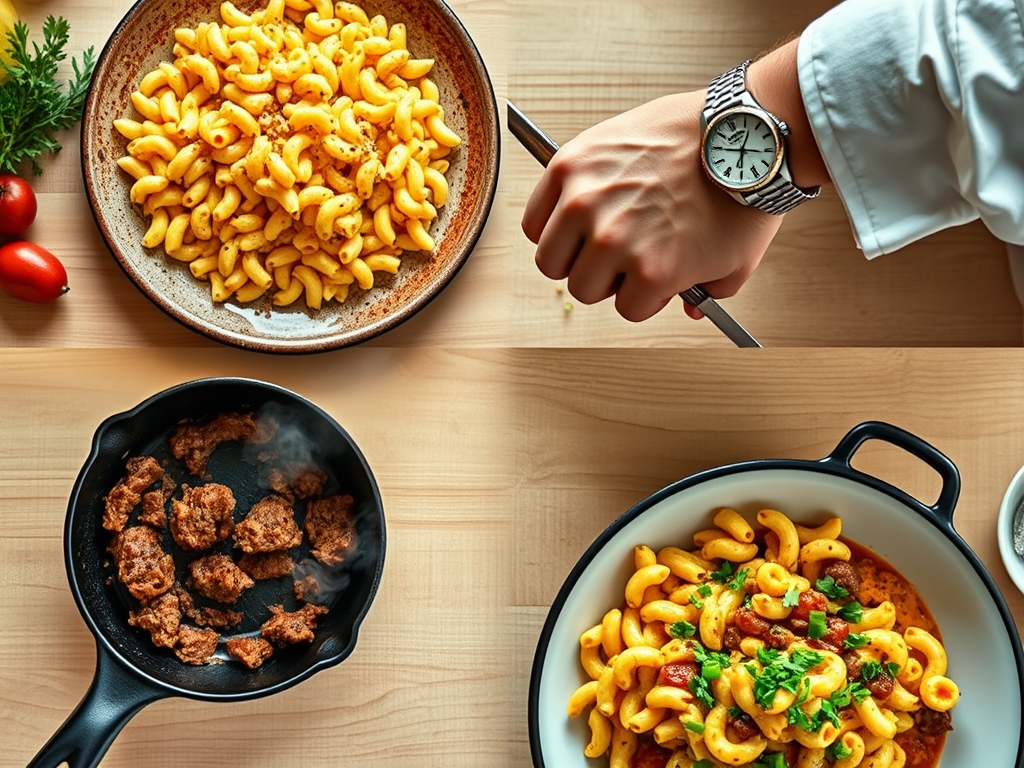
1. The Maillard Sear
Heat a heavy-bottomed skillet over medium-high heat until a drop of water dances and evaporates instantly. Add your ground beef, breaking it apart with a bench scraper or a sturdy wooden spoon. Do not over-stir; let the meat sit undisturbed for three minutes to achieve a deep, brown crust.
Pro Tip: This crust is the result of the Maillard reaction, a chemical reaction between amino acids and reducing sugars that creates hundreds of different flavor compounds. If you stir too much, the meat steams in its own juices rather than searing.
2. The Pasta Parboil
While the meat browns, drop your macaroni into a pot of boiling, salted water. Cook for exactly one minute less than the box instructions suggest. Use a saucier if you have one, as the rounded bottom allows for better circulation of the pasta.
Pro Tip: Cooking the pasta slightly under allows for thermal carryover. The macaroni will finish cooking inside the cheese sauce, absorbing the flavor of the beef juices rather than just water.
3. The Deglaze and Drain
Once the beef is browned, drain the excess fat, leaving about one tablespoon in the pan. Add a splash of beef stock or water to deglaze the skillet, scraping up the brown bits (the fond) from the bottom.
Pro Tip: The fond contains concentrated flavor. By deglazing, you are re-incorporating those caramelized proteins back into the sauce, creating a much richer profile for your kraft mac and cheese ground beef recipes.
4. The Emulsion Phase
In the warm pasta pot, combine the butter, milk, and cheese powder. Use a whisk to aerate the mixture until it is completely smooth and glossy. Slowly fold in the cooked macaroni and the seared beef.
Pro Tip: This is a lesson in emulsification. The fats from the butter and beef must bind with the liquid milk and the starches from the pasta to create a stable, creamy sauce that does not break or become oily.
5. The Final Tempering
Turn the heat to the lowest setting and stir the mixture for 60 seconds. This allows the starches on the surface of the pasta to thicken the sauce slightly, ensuring every noodle is perfectly coated.
Pro Tip: This final step utilizes starch gelatinization. As the temperature rises slightly, the starch granules swell and burst, thickening the surrounding liquid into a velvety coating.
The Deep Dive:
From a macro nutrition perspective, this dish is a powerhouse for active kids. One serving provides roughly 28 grams of protein and 45 grams of carbohydrates, making it an excellent post-soccer-practice recovery meal. If you need to pivot for dietary restrictions, the world is your oyster. For a Keto version, swap the macaroni for roasted cauliflower florets and use a sugar-free cheese sauce. For Gluten-Free needs, there are excellent brown rice pasta versions of the blue box that behave almost identically in the pot.
The Fix-It: Common Pitfalls
- The Sauce is Gritty: This usually happens if the heat is too high when adding the cheese powder, causing the proteins to clump. Fix: Add a tablespoon of warm milk and whisk vigorously off the heat.
- The Beef is Dry: You likely overcooked it during the browning phase. Fix: Add a small splash of beef broth to the final mixture to rehydrate the protein.
- The Pasta is Mushy: You skipped the al dente rule. Fix: Next time, use a timer. For now, add some toasted breadcrumbs on top to provide a necessary textural contrast.
Meal Prep & Reheating Science
To maintain "day-one" quality, store leftovers in an airtight container. When reheating, do not just microwave it on high. Add a teaspoon of milk per serving to restore the viscous nature of the sauce. Heat in 30-second intervals, stirring in between to redistribute the thermal energy and prevent the fats from separating.
The Wrap-Up:
Transforming kraft mac and cheese ground beef recipes from a basic pantry pull into a structured, scientifically sound meal is the ultimate kitchen win. By focusing on the Maillard reaction for the beef and a perfect emulsion for the sauce, you have elevated a childhood favorite into a high-protein dinner that satisfies both the "smart, witty" chef and the hungry kids at the table. It is fast, it is technical, and most importantly, it is delicious. Now, grab your favorite bowl and enjoy the fruits of your culinary labor!
The Kitchen Table:
Can I use ground turkey instead of beef?
Yes, ground turkey works perfectly. However, because turkey is leaner, add a teaspoon of olive oil to the skillet to ensure you still achieve a proper sear and prevent the meat from becoming too dry during the browning process.
How do I make the sauce extra creamy?
To achieve a superior creaminess, swap half of the milk for heavy cream or add a tablespoon of cream cheese. This increases the fat content and creates a more stable emulsion that clings better to the macaroni and beef.
Can I add vegetables without the kids noticing?
Absolutely. Use a microplane to grate zucchini or carrots into the beef while it browns. The small particles will soften and blend into the texture of the meat, providing extra nutrients without altering the flavor profile significantly.
What is the best way to store leftovers?
Place leftovers in a shallow, airtight container in the refrigerator for up to three days. Shallow containers allow the food to cool faster, which prevents bacterial growth and keeps the pasta from becoming overly soft from trapped steam.