
Imagine the sizzle of a heavy bottomed skillet hitting a high flame; the scent of iron and caramelizing fats immediately fills the room. We are moving far beyond the standard Tuesday night taco. When you master these creative ground beef recipes, you are not just cooking; you are engineering a symphony of texture and deep, savory umami.
The magic of ground beef lies in its surface area. Unlike a steak, which only browns on the outside, ground beef offers millions of tiny edges ready for the Maillard reaction. This is where we transform humble protein into something spectacular. Whether you are craving a deconstructed Korean bibimbap or a Mediterranean stuffed pepper with a twist, the secret is in the technique. We are going to look at how to render fat properly, how to deglaze for maximum flavor, and how to keep your meat tender rather than rubbery. Grab your favorite apron and a glass of wine; we are about to turn your kitchen into a high end bistro.
The Gathers:
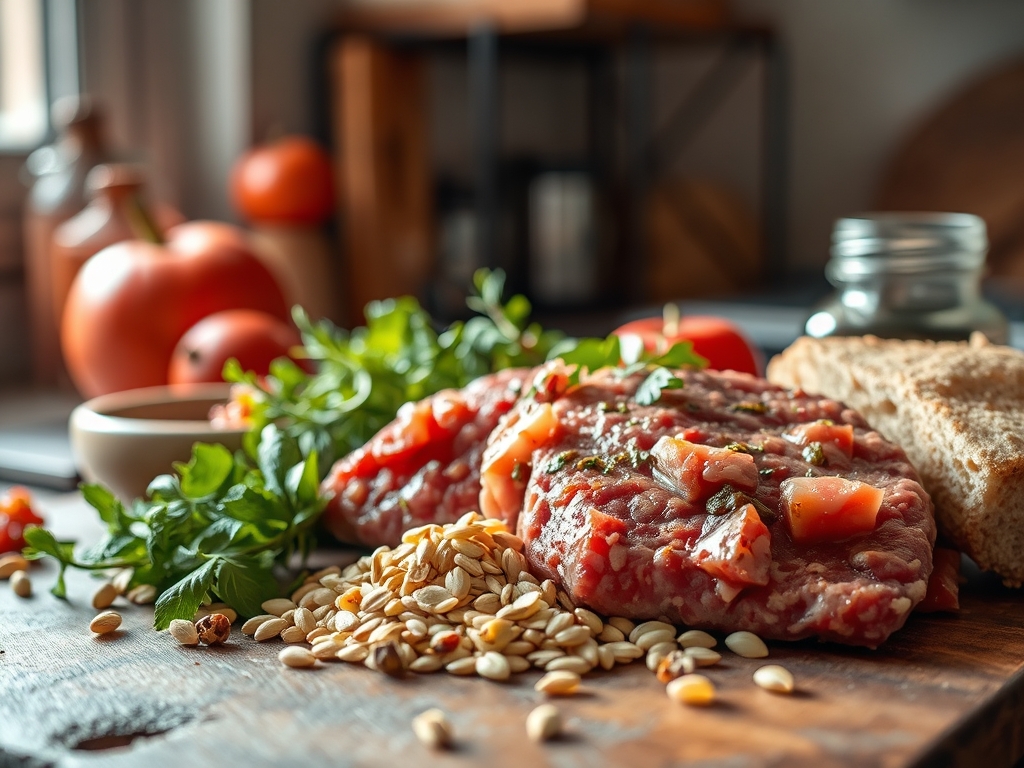
Setting up your mise en place is the difference between a frantic kitchen and a rhythmic one. Start with high quality ground beef; ideally a 80/20 blend. The twenty percent fat content is essential for a viscous mouthfeel and to prevent the meat from drying out during high heat searing. You will need a digital scale to portion your meat accurately, ensuring even cooking times across the board.
Gather your aromatics: shallots, garlic, and ginger. Use a microplane to grate your garlic and ginger into a fine paste; this allows the essential oils to infuse the fat instantly without the risk of burning large chunks. For the creative ground beef recipes we are tackling, keep a bottle of dry sherry or balsamic vinegar nearby to deglaze the pan.
Smart Substitutions: If you are looking for a leaner profile, you can swap half the beef for finely chopped cremini mushrooms. This "blend" technique maintains the savory depth while increasing fiber. For a piquant kick, swap standard black pepper for Aleppo pepper or toasted Sichuan peppercorns to add a complex, floral heat.
The Clock
Efficiency in the kitchen is about "Chef's Flow." This means grouping tasks to minimize downtime. Expect a total prep time of 20 minutes for chopping and weighing, followed by a 25 minute cook time.
The flow begins with the "Hard Sear." Never crowd the pan; doing so drops the temperature and causes the meat to steam in its own juices rather than brown. Work in batches if necessary. While the first batch renders, use that time to prep your garnishes. This overlapping method ensures that by the time the last bit of beef is finished, your table is already set. Total time from fridge to fork is roughly 45 minutes.
The Masterclass
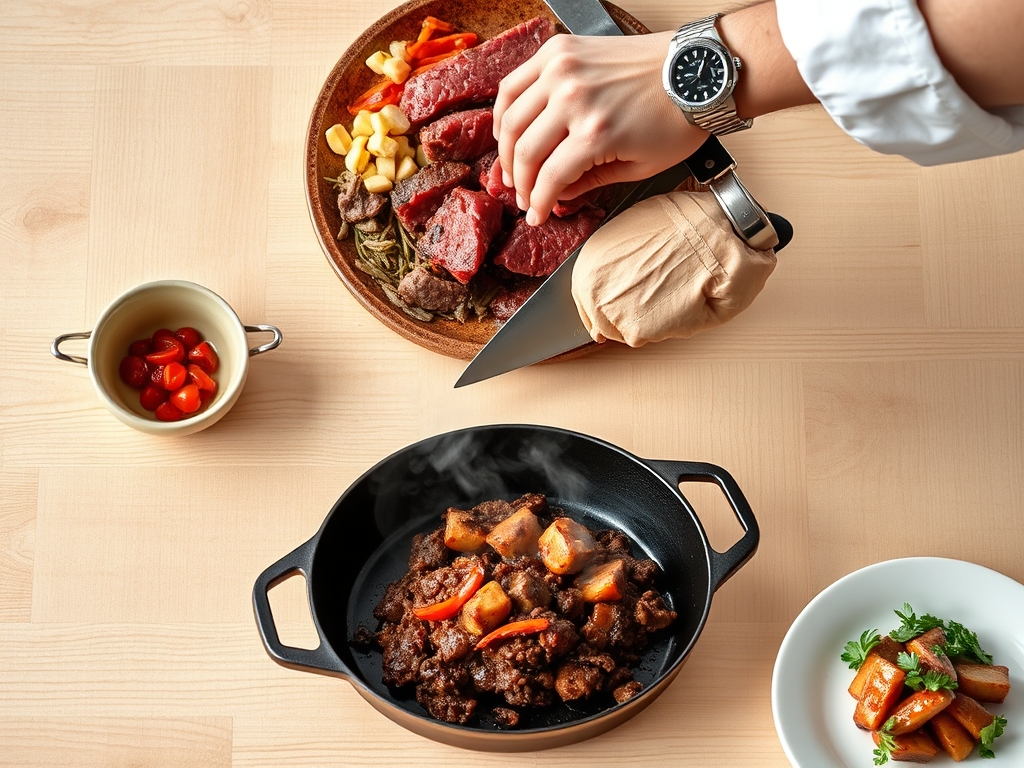
1. The High Heat Foundation
Heat your cast iron or heavy bottomed skillet until it is shimmering. Add a high smoke point oil like avocado oil. Place the beef in the pan in large chunks rather than breaking it up immediately.
Pro Tip: This technique encourages enzymatic browning (the Maillard reaction). By leaving the meat undisturbed for three minutes, you create a crust that locks in moisture and develops complex flavor compounds that simply do not exist in grey, steamed meat.
2. The Deglaze and Scrape
Once the meat is browned, remove it and look at the bottom of the pan. Those brown bits are called "fond." Pour in a splash of liquid; beef stock, wine, or even water; and use a bench scraper or wooden spoon to lift those bits.
Pro Tip: This is the secret to a professional sauce. The fond contains concentrated proteins and sugars. Deglazing creates a viscous pan sauce that coats the meat, ensuring every bite is seasoned from the inside out.
3. Incorporating the Aromatics
Lower the heat to medium and add your microplaned aromatics. Sauté them in the rendered beef fat until they are translucent and fragrant.
Pro Tip: Fat is a flavor carrier. By sautéing your spices and aromatics in the rendered fat, you aerate the volatile compounds, making the scent and taste more pronounced throughout the entire dish.
4. The Final Emulsification
Return the beef to the pan and add your final sauce components, such as soy sauce, tomato paste, or heavy cream. Stir vigorously to combine the fats and liquids.
Pro Tip: Use a saucier if you have one to help with evaporation. This step creates a stable emulsion, preventing the fat from separating and leaving a greasy film on the palate.
5. The Rest and Carryover
Remove the pan from the heat while the meat still looks slightly moist. Transfer it to a warm bowl and let it sit for three minutes before serving.
Pro Tip: This accounts for thermal carryover. The internal temperature will continue to rise by about five degrees after it leaves the pan. Resting allows the muscle fibers to relax and reabsorb the juices, ensuring a tender result.
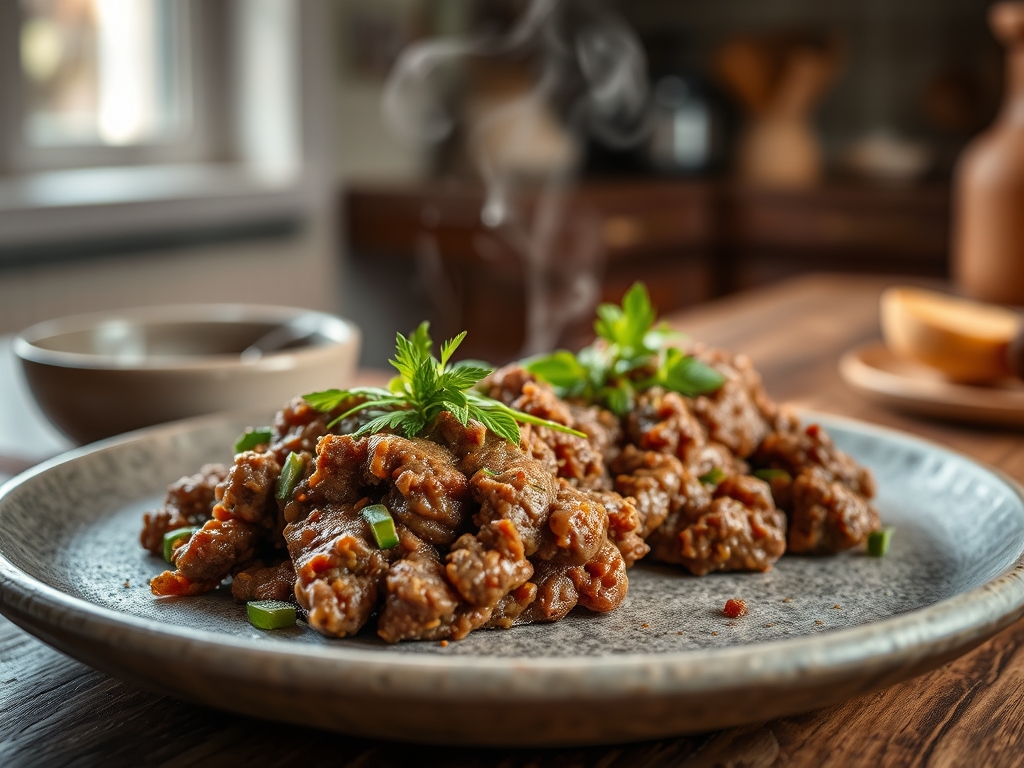
6. The Bright Finish
Just before serving, hit the dish with something acidic; lime juice, rice vinegar, or fresh parsley.
Pro Tip: Acidity cuts through the richness of the beef fat. It acts as a palate cleanser, making the savory notes pop and preventing the dish from feeling "heavy" or one dimensional.
The Deep Dive
Macro Nutrition: A standard 4 ounce serving of this beef preparation provides approximately 26g of protein and 15g of fat. It is an excellent source of Vitamin B12 and Zinc, which are vital for energy metabolism and immune function.
Dietary Swaps:
- Keto: Serve your creative ground beef over cauliflower rice or inside lettuce cups to keep net carbs near zero.
- Vegan: Use a pea protein based crumble and add a teaspoon of liquid smoke to mimic the "char" of real beef.
- Gluten Free: Ensure your deglazing liquid is GF; swap soy sauce for liquid aminos or tamari.
The Fix-It:
- Problem: The meat is grey and tough. Fix: Your pan wasn't hot enough. Next time, wait for the oil to "shimmer" before adding the protein.
- Problem: The sauce is too salty. Fix: Add a splash of heavy cream or a pinch of sugar to balance the sodium levels.
- Problem: Too much liquid in the pan. Fix: Use tongs to remove the meat, boil the liquid down by half to concentrate it, then toss the meat back in.
Meal Prep: To maintain "day one" quality, reheat your ground beef in a skillet with a tablespoon of water rather than using a microwave. This prevents the proteins from becoming rubbery and restores the moisture lost during refrigeration.
The Wrap-Up
Mastering creative ground beef recipes is about understanding the chemistry of the kitchen. When you respect the sear, embrace the deglaze, and balance your fats with acidity, you elevate a simple ingredient into a gourmet experience. These techniques are your new culinary toolkit. Go forth, experiment with bold flavors, and remember that the best meals are the ones shared with a bit of wit and a lot of heart.
The Kitchen Table
How do I prevent ground beef from getting dry?
Always use an 80/20 fat blend and avoid overworking the meat. Do not press down on the beef with a spatula while cooking; this forces out the essential juices and results in a crumbly, dry texture.
What is the best way to store leftovers?
Place the beef in an airtight glass container within two hours of cooking. It will stay fresh in the refrigerator for up to four days. For longer storage, freeze it for up to three months in vacuum sealed bags.
Can I cook ground beef from frozen?
It is possible but not recommended for high quality results. For the best Maillard reaction, thaw the meat completely in the fridge overnight. This ensures even cooking and prevents the exterior from burning while the center remains raw.
Why does my ground beef produce so much water?
This usually happens when the pan is overcrowded. The temperature drops, causing the meat to steam. Cook in smaller batches and ensure your skillet is scorching hot before adding the beef to evaporate moisture instantly.